Crochet Granny Squares Soduku Blanket

I've been making a granny square blanket for a while. And now I'm finished! It started out with just 5 little squares:
I 'instagrammed' my progress which you can see above. This is my first proper crochet project (I like to start big) and I have enjoyed the process of making it. It is a very therapeutic craft so I encourage you to learn. You can learn the basic stitches here and there is also a pattern for the 'granny square' just as I have made for my blanket.
 And now it's finished. If you're interested the geek in me wanted to make a blanket with granny squares in 12 different colour combinations. I wanted to have one of each colour in each row and one in each column, hence the soduku blanket. This is the grid I followed to make sure it worked out right:
And I'm delighted with the results. It looks random and gives an even spread of colour but I know it has a hidden pattern. 
I think it will stay here for now, draped over this chair waiting for winter. Zoe xx

Tunisian Crochet Hook Holder


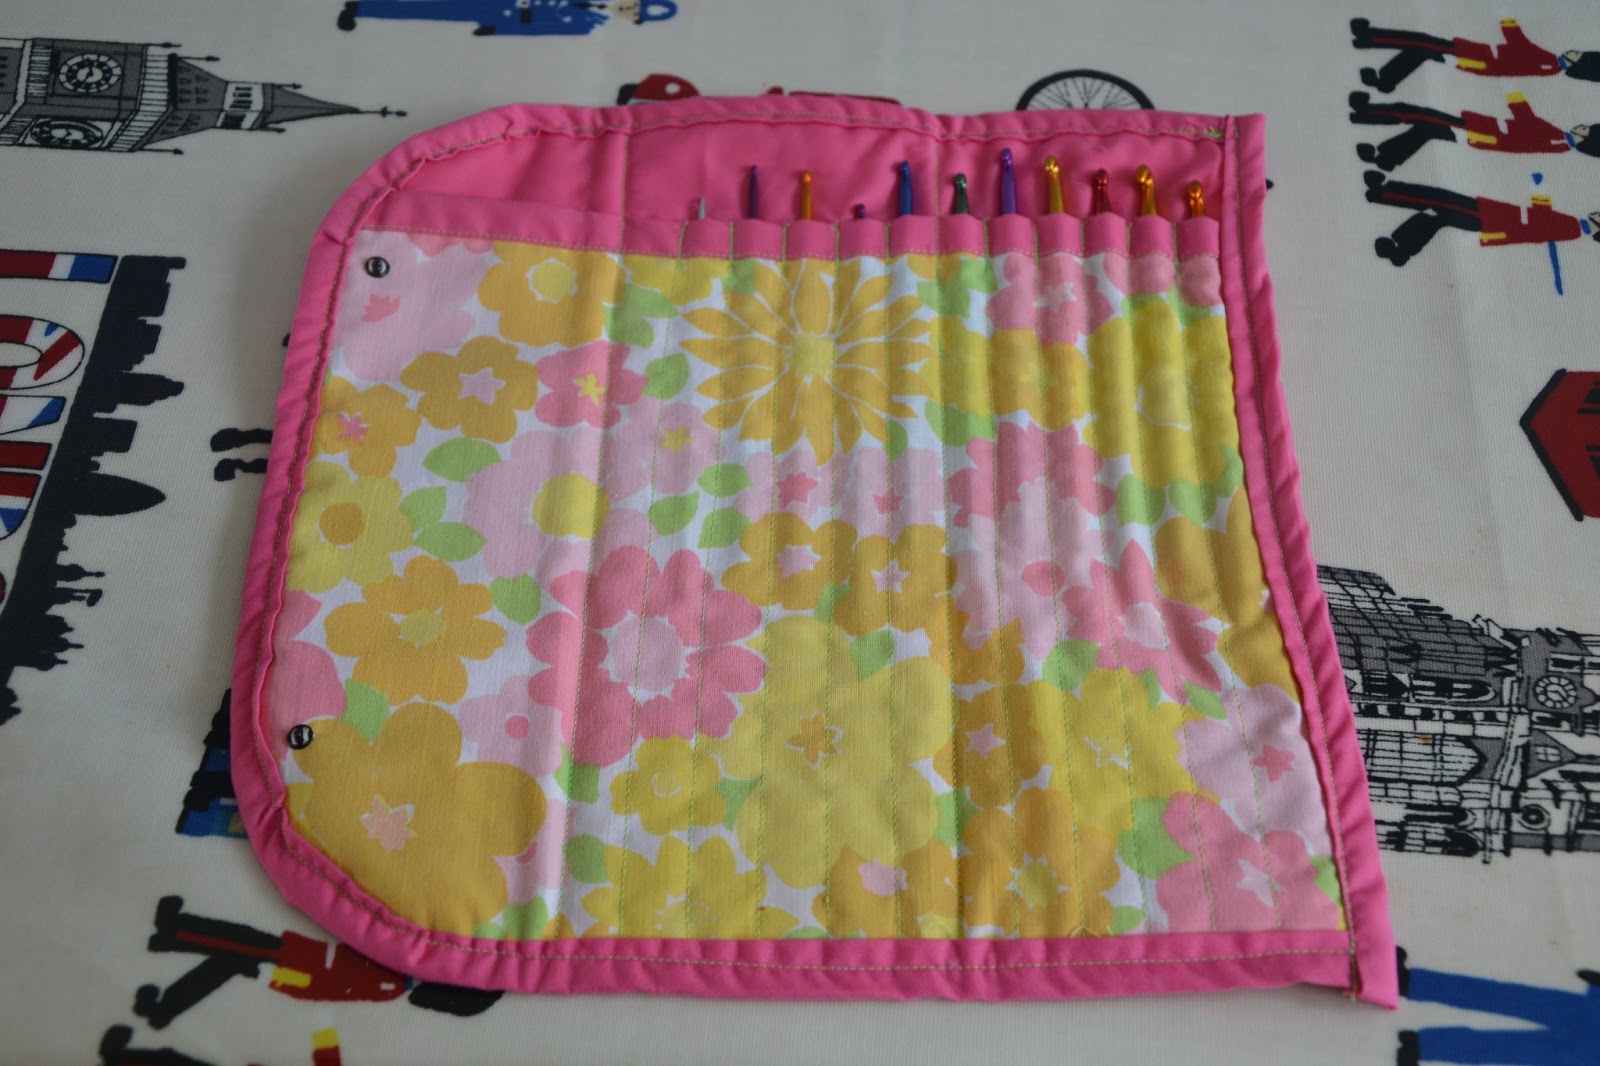
This week is my Sisters birthday. She is a fellow 'crafter' and has recently invested in a set of Tunisian crochet hooks. I decided to make her a case to keep her hooks in. This is what I did:
First I chose a fat quarter of this vintage fabric to be the main fabric and a coordinating plain fabric for the lining and binding. 
The hooks are just less than 30cm long so I also made it 30cm tall. I cut a 30x30cm square from both fabrics and a 20cm square from the main fabric.
 I needed her case to be long enough for 12 hooks and I wanted 1.5cm width for each 'hook pocket'. I also needed an extra 10cm to make a flap to close it. Therefore I needed the case to be 30cm wide (12x1.5+10).
I also needed a 30x30cm square of wadding (batting). I didnt have quite the right size in my thinnest wadding so I made it up from two rectangles which hasnt affected the final result but it would be easier to cut one square.
I then made a 30cm peice of bias binding and stitched this along one long edge of the rectangle of the main fabric. 
I then used a dressmakers pen and my quilters ruler to draw 13 lines on the rectangle. The first line was about 1cm in from the right (if the bias binding was at the top) and then marked 12 more lines each 1.5cm to the left of the previous one.
I then pinned this rectangle to the square of the plain fabric, lining up the bottom of the rectangle with one edge of the plain square (should have photographed this, sorry!) I then stitched along all the lines except the 1st, 7th and 13th line. To make sure the 'hook pockets' are strong I stitched forward and back along the very top of the pocket where the bias binding is. The picture below shows this better.
I then trimmed the threads.
I then lay the large square of main fabric face down on the mat. I lay the wadding on top, lining up the edges. then I lay the pockets on top of this face up.
Then I stitched along the 1st, 7th and 13th lines from the very top to the bottom.
I then curved round the corners on the left hand side, I made it symmetrical by folding these in half and doing both together but I did it freehand.
I then stitched binding around the curved edge. I was lazy and didn't actually make 'bias' binding so that's why it doesn't lie flat but after ironing it it looked a little better.
I then stitched another piice of binding down the remaining edges, tucking in the corners as I went. I trimmed any remaining threads and washed off the dressmakers pen marks. 
I then hand stitched in some poppers and voila:
I hope she likes it! Zoe xx

P.S She did.


Tunic Dress

I have been hoping to start dressmaking for some time but have been nervous. I didn't want to spend money on a pattern and fabric and buttons and zips and then the finished product be totally unwearable. So I decided to try and find a free pattern. The problem is most free dress patterns I've found are for children. So I decided to adapt a child's pattern for me. I used this tutorial here.  
I used a non stretch vest top to make the pattern in the same way as in the tutorial. I took over the dining room table to assemble all my equipment.
Then I sewed my socks off and finished super fast. It as a really easy pattern to follow and a great dress to make as a first go. 

The only part I left out was the waste band because I tried my dress on before sewing it in and it fit really well as it was. My button fastening was bright pink 
I was chuffed with the result and now I am obsessed with pinning other dress patterns ready for the next project.

Have you found any good patterns? Or have you adapted anything? I hope so. X
Follow my blog with Bloglovin


Upcycle: Blue Bureau


I've been decluttering and redecorating my downstairs over the last year or so. To do a proper job I needed to buy a few new peices of furniture (ironic when I'm trying to get rid of things). When I say new, I mean new to me. I found a sweet old bureau to go near my entrance but wanted to make it my sweet old bureau. So I decided to paint it and distress it to make it my own. 

This is what I used:
1. A sweet old bureau 2. Sugar soap solution 3. White emulsion 4. Blue emulsion 5. Fine and coarse sand paper 6. Clear varnish 7. Two large paintbrushes  8. A drill 9. New drawer handles 

This is what I did:
I started by removing the original drawer handles and hinges and then I cleaned the furniture with sugar soap solution and used the find sand paper to lightly sand down the wood. I then painted it with a thick coat of white paint. When dry I painted it with the blue paint. I needed two coats of the blue to cover the white but if you can do it with one that's even better. 

I then sanded down the corners and areas where natural wear and test would occur with the coarse sand paper. This allowed the white paint to show through and created a 'shabby chic' appearance which I hope looks as though over a period of time it has received several paint makeovers. It's tricky to know how much to sand but I would really go for it because I wish I had sanded more. 

When I was happy with the look I used the second paintbrush to varnish it. This needed two coats. Then I screwed back in the hinges and drilled new holes for my new drawer handles. I bought these on eBay and LOVE them. 
Once the new drawer handles were screwed it it was finished and ready to go. 
I'm so pleased with this transformation and I'm looking forward to lining the drawers and inside. Ill show you that when I'm finished too. I hope you have some old furniture you can revive too. Zoe x


Welcome to Tadpegs

This is me, I'm Zoe. I have three young children and fill most of my time caring for these treasures. However in every spare second I get I make. 
Or bake.
Or crochet.
Or stich.
Or sew.
Or paint.
You get the idea. Ill share with you some of the things I've made so far and some of my current and upcoming projects. Enjoy. Zoe. X


Related Posts Plugin for WordPress, Blogger...