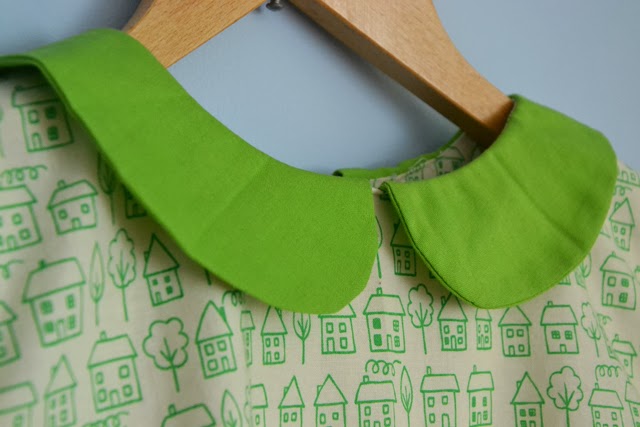
Sorbetto Top With Peter Pan Collar


Now that I am sewing more of my own clothes I am really hunting for patterns and fabrics that will work day-to-day. I would wear a dress every day if I could because I love wearing dresses but some days this just isn't practical. One pattern I have decided to use is the for the sorbetto top, its FREE to download. I made myself one according to the pattern first but what I really fancied was a top with a peter pan collar. I adapted the pattern to make this top.


The sorbetto top pattern is great for an absolute beginner so you should have a look. I originally was going to share instructions for altering the neckline and adding the peter pan collar but it was a little more complicated than I thought. I ended up having to un-pick it to add an extra dart in the top, then make the collar smaller before sewing it all back together. Maybe I'll make another one another day and I'll share instructions with you then. Zoe x

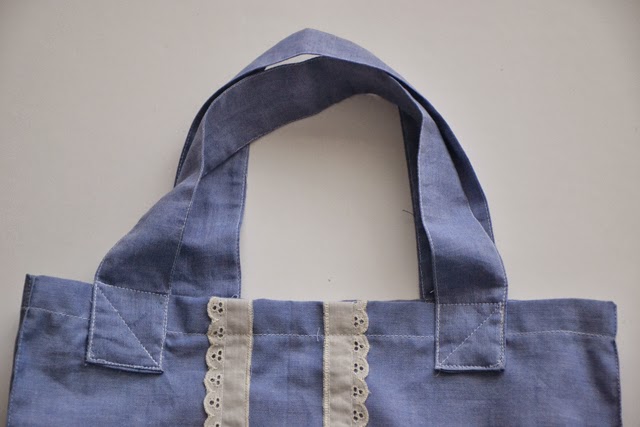
DIY Chambray Tote Bag


Can you believe I have never made myself a bag before? Well there is no time like the present so when I had some chambray fabric leftover from my dress I decided it was the perfect time to start. It was one of those moments when I asked myself 'what have you been waiting for?' It is quick and easy to stitch up and the results are both pretty and useful.

To make your own you will need:
1/2 metre of fabric
Broidery anglais for decoration (optional)
Sewing machine and thread

Method:
Cut your fabric into 2 large rectangles that are a few inches wider and taller than you would like your finished bag to be, and two longer thinner rectangles that will become the straps. The strap rectangles will need to be the length you want your finished handles to be and about an inch wider than twice the finished width of your handles.

Note that my finished handles were half this long as I decided what is shown in the photo was too long.


Then if you want to decorate your bags at all you need to stitch on any embellishments, I sewed on two length of broidery anglais.

Then place your two larger rectangles together with the decoration on the inside (or right sides together). Starting at the top corner stitch down one side, across the bottom and back up the other side, reinforce the start and finish with some reverse stitching.

Then press open your seams. The next step turns your flat back into a more structured bag. You need to pinch the bottom corners so that the side and bottom seams come together:


Then sew a diagonal along the corner so that your pinched corners make a bag shape.

Then turn your bag right side out. If you want to add more structure to your bag, press the sides of the bag by pinching and pressing up from your diagonal line of stitching you just did, to the top of the bag and then stitch as close as you can to the pressed corner all the way around the edges of the sides of the bag:

To finish the bag before adding the handles, turn 1cm along the top edge inside the bag, press and then turn another 1cm and press. Stitch around the top hem.


To make your handles, fold the long rectangles in half lengthways with right sides together. Stitch all the way along the long side. Then turn your handle right sides out and press. Turn the ends in and press again. Finally pin your handles in place and sew to the bag with a square of stitching and a diagonal line.


And that's it, you have made yourself a bag! Time to fill it up and take it shopping I think. (Or take it empty and come back with it full). Enjoy. Zoe x

5 Things for Spring

I am so enjoying the spring weather so far. The barbecues (2 so far), the bare legs (occasionally), hanging my washing out to dry (Ok so this makes me sound old) are all things that I have enjoyed so far since it starting getting a little warmer. I wanted to share with you some ideas from the archives that would work for spring to keep you busy. Maybe you could try decorating a flower pot like this triangle one above?

Or you could make some homemade lemonade, its deliciously refreshing and perfect for a sunny day or barbecue.

You could get hold of some old furniture from a second hand shop or car boot (another great thing about spring) and paint it in the garden like I did with our bed frame.

Even though it's sunny it is still chilly some days, but don't despair you could easily sew up a floral scarf to wear for those milder days. This project is very easy and suitable as a first sewing project.


Or if you are a little more advanced in your sewing then you could try making yourself a spring dress, I have made two Elisalex dresses so far this year and think the pattern is lovely. (Here and here)

Do you have any other ideas for spring? I need some inspiration so please share! Enjoy the sunshine (if it comes back). Zoe x

Elisalex Take 2: Chambray Dress With Gathered Skirt


I think I may have made myself the perfect spring dress! This chambray dress is so versatile and so easy to wear. I have used the Elisalex dress pattern from By Hand London for the second time (see the first one here) but this time added a gathered skirt. The original pattern has a beautifully flattering tulip skirt but I wanted to make a more casual and easy to wear dress. I think the gathered skirt was the perfect option don't you?


I chose the chambray fabric because it's so versatile, soft and easy to work with and light enough for a spring dress. For those of you who don't know, chambray is a little bit like a light denim. It is made of cotton and has dark blue threads running in one direction and white threads running in the other, just like denim, but is much softer and thinner than denim. Think denim shirt (chambray) vs denim jacket (denim). It works so well for the dress because I can literally wear anything with it, spring florals, autumnal scarf, wintery knit and tights or just some sandals for summer. Winner.

You can easily add a gathered skirt to any bodice pattern so I will show you how. Make your bodice first and check it fits. Then you can make the skirt. First of all you need to cut 3 rectangles of fabric. The first needs to be the length that you want your finished skirt to be (plus seam allowance) long and your hip measurement wide. The other two need to be the same length (skirt length plus seam allowance) and half your hip measurement wide. You don't need to be too precise, you can always hem it more once you have finished. If you want a fuller skirt just make them all wider.

Once you have cut these pieces out of your fabric, sew the side seams together and press open. Leave the back seam unstitched, you will sew this up when you finish your skirt with the zip (or buttons).

Then you need to turn the tension of your sewing machine down as low as you can and increase the stitch length to the longest setting. You are going to sew three lines of 'tacking' stitch across the top of each section of the skirt:

It's a good idea to sew these in sections, when you gather your skirt together (the next step) if the lines of tacking stitch are too long they are more likely to break. I would start and finish right next to the seams. Then on one section you need to hold onto the thread on one end and gently push the fabric closer together to form gathers. Try to spread them out evenly along the section. Hold it up to the section of your bodice that you will attach it to to check if you have gathered it enough, the back gathered section should fit into the back bodice section like this:

Once you are happy with the gathers on once section more on to the next. Check that you have gathered the right amount for each part of the skirt to fit with the bodice. When it is all gathered to the right size and as evenly as possible, turn your skirt pieces so the the wrong side (with the open seams) is facing down. Place your bodice on top with the wrong side (the inside) facing up along the gathered edge of the skirt, line up the seams and pin your skirt to your bodice. If your bodice has a lining like mine then only pin the skirt to the outside and not to the lining.

Stitch the skirt in place (make sure you reset your tension and stitch length), you might want to do two lines of stitching for extra strength as the bodice is holding together a lot of fabric. Then press the seam towards the bodice. Finish off your dress according to the pattern instructions.


I added an invisible zip instead of the long exposed zip. I also added some top-stitching around the bodice in a brown thread as I felt this finished the garment nicely like a denim or chambray dress you might buy.


Is your wardrobe set for spring yet? Well if you don't own a chambray dress yet you should DEFINITELY make one! I have worn this one so much already I can't tell you how much I love it. Have fun making and wearing your own. Zoe xx

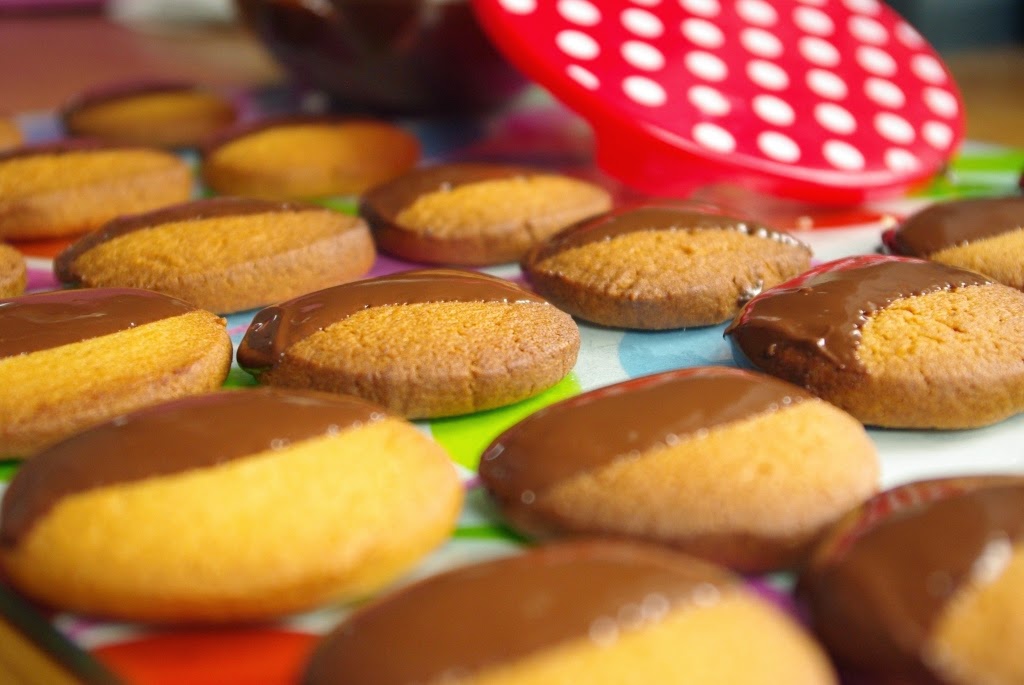
Dished Up: Chocolate Malt Biscuits

I made some malt loaf recently. The aim was to make something that I'm not that keen on so that I wouldn't be tempted to eat it. Unfortunately it turned out that my family weren't that keen on eating it either (I did find some kind friends who helpfully finished it and assured me that it was in fact nice malt loaf). Nonetheless I was left with most of a jar of malt extract, a curious substance that I bought from a health shop that in form is very like runny honey and in smell is unsurprisingly reminiscent of malteasers. I figured if I substituted malt for honey in a recipe I could use the extract. Honey can be used in many things but I didn't think that 'Malt and Mustard Chicken' would be too much of a hit so I pulled out an old faithful cook book to see what honey biscuit recipes I could find. Well you could knock me down with a feather but the old faithful had a recipe for Malt Biscuits! Naturally I didn't leave the recipe completely untouched but the basic ingredients are the same.

The original recipe is from Australian Women's weekly Big Book of Beautiful Biscuits and makes around 45. If half of this is enough then you can freeze some of the dough after step 4. When you want to make the rest, get the dough out and leave at room temperature until you can slice it and then complete the rest of the steps.

The whole process including chilling can be done in an hour if you are pretty speedy and use the freezer. If you like more leisurely baking then give your self at least on hour and a half although hands on time is a lot less than this.

What you need:
125g Butter
110g Caster Sugar
1 egg
2 Tbsp Golden Syrup
2 tbsp Malt extract
375g Plain Flour
1/2 tsp Bicarbonate of soda
1 1/2 tsp Cream of tartar
200g Plain Chocolate

What you do:
1. Beat the butter, sugar and egg in a freestanding mixer until smooth. Add the syrup and the extract and mix until combined.
2. Sift in the dry ingredients and beat until the mixture comes together as a soft dough.
3. Roll some clingfilm out across your work surface and place the dough on top.
4. Shape the dough into a long sausage (or two shorter ones) about 5cm in diameter, wrap the film around it and place it in the fridge for 30minutes or the freezer for 15minutes. (The dough is very sticky so you may find it useful to do some of the shaping when the film is already wrapped around the dough).
5. While the dough is chilling heat the oven to 160 celius and line some baking trays with non stick paper.
6. Take the chilled dough out the fridge, cut the sausage into 0.5cm slices and place them onto the prepared trays a couple of cm apart. Bake for 16 minutes or until golden brown. Leave to cool on the trays.
7. When the biscuits have completely cooled melt the chocolate gently and dip half the front of each biscuit into the chocolate. Place the biscuit back on the non-stick tray and leave to set.


So far these are going down a lot better than the malt loaf. Cassie xx

Make Your Own Coffee Bags


I love coffee. I'm also a bit of a coffee snob because instant just doesn't cut it. It has to be a proper coffee. To make sure I can always get my coffee fix I thought it was high time I made myself some coffee bags, just like tea bags but for coffee. Even better this DIY is super simple.

What You Need:
1. Coffee filters (I used large ones I bought on eBay)
2. Fresh coffee for filters of cafeteires
3. Sewing machine (or needle and thread)
4. Embroidery thread
5. Scrap of card
6. Double sided tape

What to do:
First cut out a large long rectangle out of a coffee filter. You need it to be twice as long as your finished coffee bag and it will need to be larger than a teabag because it needs to hold more. As a rough guide about 7-8cm by 20cm should be enough:

Then fold your rectangle in half and stitch along the two long sides to form a small pocket. Measure about 1tbsp of your coffee:


Fill up your pocket with the coffee, then sew up the top:


Fold down the top two corners of your pocket:


If you haven't already trim all your loose thread ends. Take a length of embroidery thread and tuck one end into a small fold at the top of your coffee bag and sew it in place:


Then take your scrap of cards, pop a small piece of double sided tape on one side and fold it in half with the tape inside.


Tuck the loose end of your embroidery thread inside before you stick it shut. Then you have made a tasty and pretty coffee bag:

To make your cup of coffee pop your bag into some hot water for about 5 mins. You will probably need to do some dunking to get the coffee flavour to really come through just like you would with a tea bag. Then take your coffee bag out and give it a stir before adding your milk and sugar if you like that sort of thing.

This DIY takes about 5 minutes to make and if you are making several at once you could easily make a months supply. So what are you waiting for? Zoe x

Celebrating 100 Posts With Very Lemonny Lemon Cake!

It's a day to celebrate for us today. This post marks the 100th post so far into this blog. Woop Woop! And of course what better way to celebrate than with some yummy cake (any excuse). When I mentioned this idea to cassie she volunteered to share her recipe for lemon cake with you, yes please! So without further ado let me hand over to Cassie to tell you how to make your own delicious cake:

What you need:
For the Cake:
225g Butter
225g Golden Caster Sugar
225g Self Raising Flour
4 large eggs
Zest and Juice of 1 Lemon

For the icing:
125g Butter
450g Icing sugar
Zest and Juice of 2 lemons (about 90ml of juice)
Two 18-20cm round cake tins

What you do:
1. Preheat the oven to 180 degrees celcius and line and grease your cake tins.
2. Beat together the caster sugar and the icing until pale and fluffy. (I do this in my free standing mixer).
3. Add the eggs and the flour and beat to combine. Followed by the lemon juice and zest beating again.
4. Divide the mixture between the two tins and bake for around 20 minutes or until the cake is beginning to come away from the sides of the pan. Turn out onto a rack and leave to cool completely.
5. When the cake is cool beat together the butter and the icing sugar until you have what resembles fine breadcrumbs. (Again I use my mixer for this but you can do it all by hand).
6. Add the zest and then the juice and beat vigorously until you have a smooth and light icing.
7. Put a small blob of icing on your serving plate and place one cake on top of it. Use a third of the remaining icing to sandwich the cakes together and the other two thirds to cover the top and the sides of the cake. It's unlikely that you'll manage to get a smooth finish to the icing so embrace the texture use a fork or a knife to get a homemade but delicious looking finish.

A great way to celebrate anything.

Thankyou so much to every one who has been reading along, we really enjoy reading your comments and answering your questions so keep them coming. Here's to the next 100! Zoe and Cassie. xx

Dished Up: Top Hats


For my daughter's birthday I was keen to make a little treat for her to give to the children at preschool. Naturally she was keen to help! So together we made some Top Hats. These are not a new recipe but something that Zoe and I had as children. They are really easy to make but quite delicious whether you are 3 or 30!

What you need:
200g Chocolate
35 Marshmallows
35 Smarties
mini cake cases

What you do:
1. Melt the chocolate in a glass bowl over a pan a barely simmering water. Make sure that the bowl does not touch the water. When the chocolate is all melted turn the heat down but leave the chocolate over the pan and stir it often.
2. Place about a teaspoon of the chocolate in a cake case. Push a marshmallows gently into the chocolate.
3. Dab a small blob of chocolate on top of the marshmallow and top with a smartie.
4. Repeat until you run out of chocolate and leave to set. If you cant wait to eat them then pop them in the fridge to speed up the process.


The recipe should make around 35 Top Hats which give you just enough for a class of children with a few spare for you to enjoy with a cuppa. Cassie xx


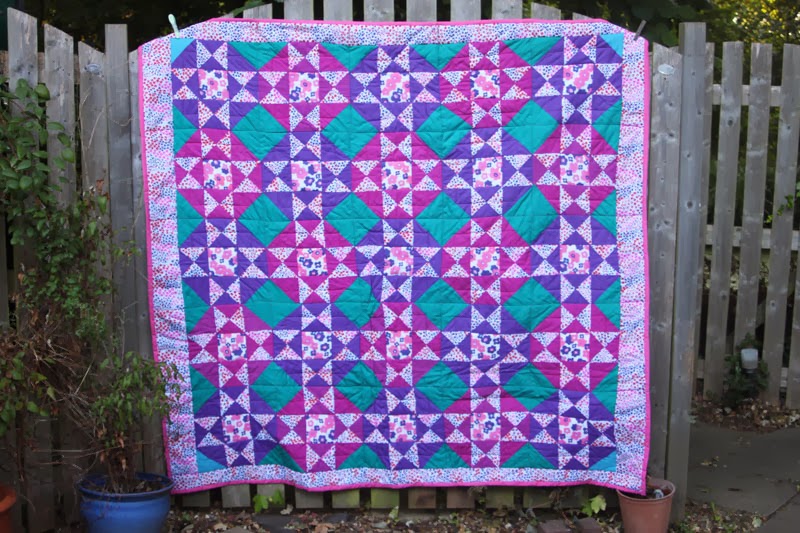
Indian Stars Quilt

This is the third quilt I ever made, I thought I would share it with you. You can see the first here and some day I will show you the second. I made this one for my mum. She went on a trip to india a few years ago and bought the bright coloured fabric for me to sew up into a quilt. I bought the floral fabrics to help break up the colour a little and to make it large enough for a double quilt.

Each block is a star block, like the large star on the star pinwheel baby quilt I showed you recently. The corners of every block are green so when you put them together it looks like there are green squares in between each star.

For the back I used more floral fabric and plain pink for the binding. I won't be sharing full instructions for this one but if you are thinking of making a quilt and don't know where to start the octagons quilts is a good place to look. Zoe x

6 Tips for Taking Scrumptious Food Photos

Do you take photos of food? Once upon a time I would have thought you were mad if you photographed your food. Since starting this blog and joining instagram I have seen the light. Getting good photographs of food is now not only fun but its quite important for me, there isn't much point sharing a recipe if the photos of the final meal (or more likely cake) don't look scrumptious. Here are my tips for improving your food photos:

Find The Light
As with any photography you will get the best photos if you take your photos in natural light. Turn the flash off your camera, place your plate near a window during the day (or even go outside) and then take your photo. If you normally eat later in the evening then you will have to decide if a good photo or hot food is more important!

Think About the Whole Photo
The last thing you want in the background of your photo is the mess you made in the kitchen when cooking. You need to think about everything that is in the photo. Clear your worktop, pop your food on a different clean table or even use a makeshift background that isn't going to distract from your scrummy make. It can add interest to the photo if you pop something pretty in the background but its important not to over clutter it, practice at this until you find a good balance.

Have a Look at Other Photos
Obviously it't not a good idea to copy someone else's idea exactly but you can study what you like about other peoples work. Pinterest is a great place to browse other photos, think about which photos your eyes are drawn to and which photos make you want to eat their food. Then look at the photos which aren't so great and what mistakes you think they have made and learn from it.

Choose a Shallow Depth Of Field
Since learning about aperture I am a little obsessed with choosing a shallow depth of field. If you haven't already read it, see my post on aperture to learn what I mean. Choose a small f-stop number to achieve this effect. Focus your camera on the most delicious looking part of your food and let the rest blur and even you will start drooling over the results.

Photograph Your Ingredients
Sometimes it's fun to line up your ingredients and take a photograph of that. It comes in handy when you want to share a recipe but also looks cute and can be artistic. This looks particularly effective if your ingredients have interesting colours like citrus fruit.

Eat Some!
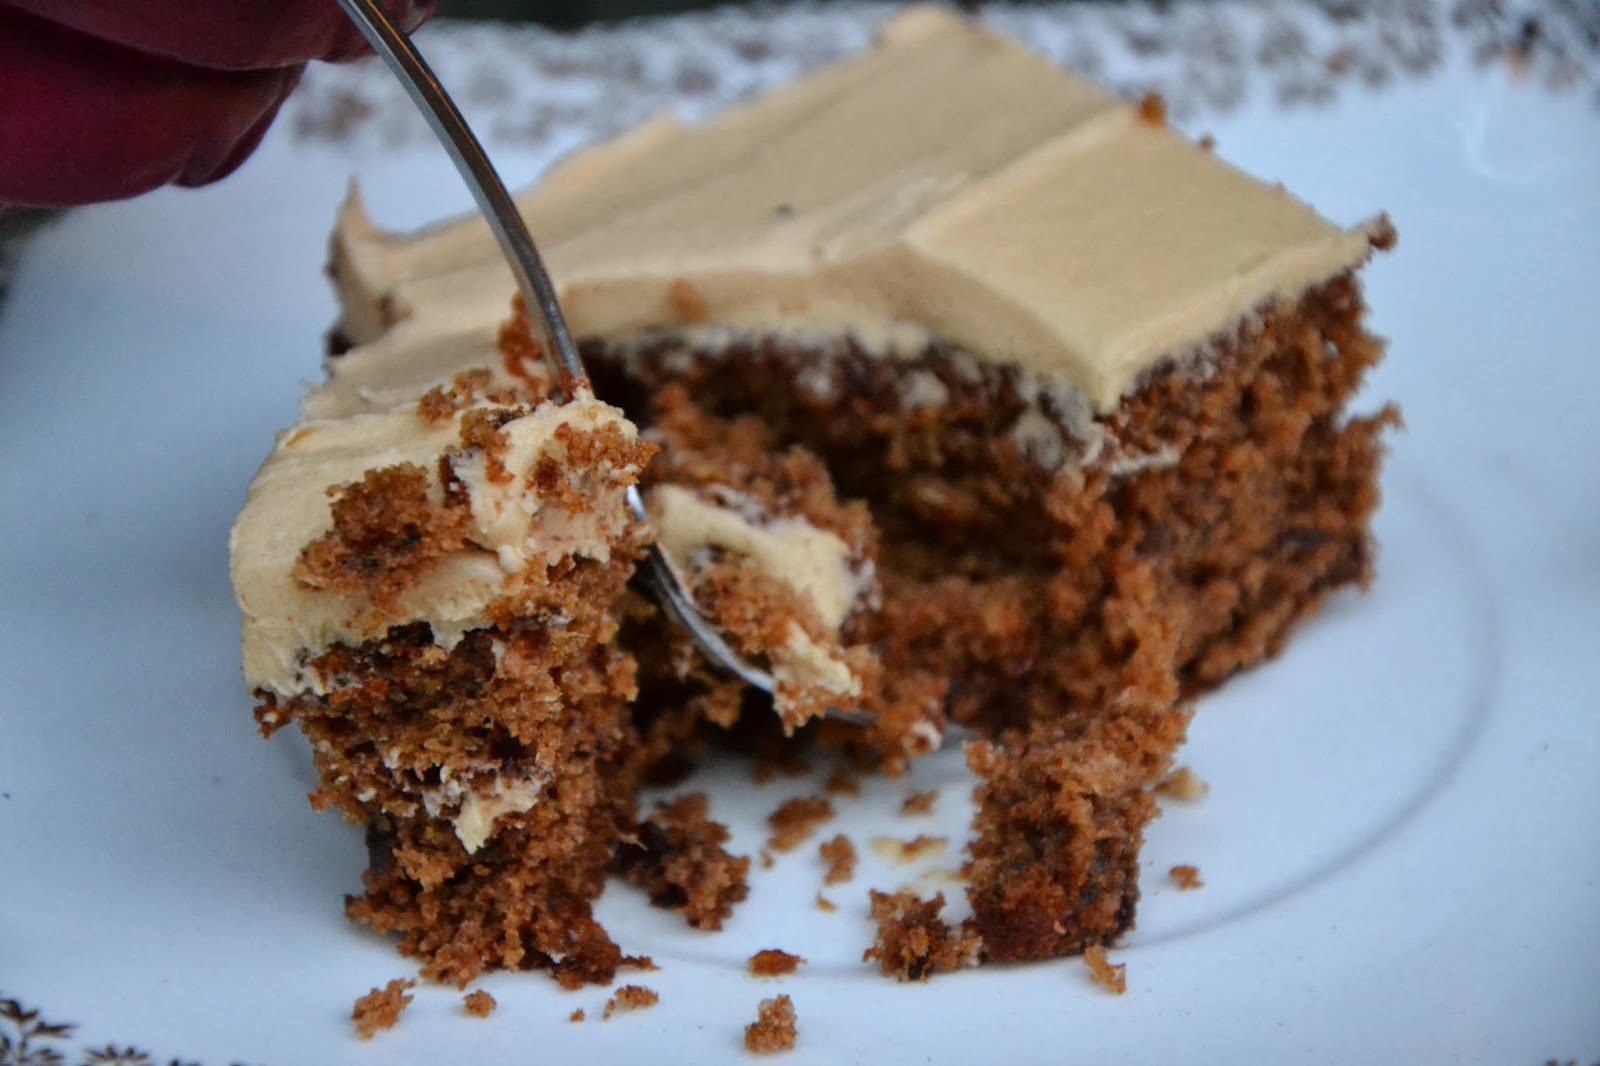
Food looks more eatable if you can see that someone else has enjoyed it or is enjoying it. Stick your fork it, take a bite and then snap away again. Similarly make it look appetising by add your favourite garnish or drizzling it with oil. Snap some before and some after just in case you prefer the before ones though!

So what are you waiting for? Get in your kitchen, bake something yummy and then take a photograph that looks just as delicious. Zoe x

PS most of these photographs are form recipes we have shared on Tadpegs so if they're making you hungry have a look at our food section to find out how to make your own. x
Related Posts Plugin for WordPress, Blogger...