

Now you know how to set up your machine and use it, it's time to start learning some of the basic sewing terms so you can begin to understand instruction in a sewing pattern. One of the most important term to learn is a 'seam'.
What is a Seam and Seam Allowance?
The seam is where two fabrics are sewn together along their edges. Most of the time when you sew, you are creating a seam. The seam allowance is the distance between the very edge of the fabric and the place where you need to sew. When you start a sewing project the seam allowance will be given to you, it may be different in different parts of the project but usually its the same all the way through. Conventionally in patchwork type project we use a seam allowance of 1/4 inch (6mm) while in dressmaking the usual seam allowance is 5/8 inch (18mm).
Sewing a Straight Seam
Most project include some straight seams, this is when the edge of your fabric pieces are straight with no corners or curves. To sew a Straight seam, first of all you need to put your two pieces of fabrics 'right sides together'. I will go into this in more detail when I talk about fabric on Tuesday but the side of your fabric you want showing on the outside of your project needs to be together:

Then you can pin your fabric piece together. Take your pins and push them through the fabric from the top to the bottom and then back up to the top again. The pointy end of the pin should be pointing into the fabric and away from your seam:

This makes it easier to take it out again before you sew that section. Put pins all the way along the edge you want to sew at regular intervals.

Once sewn you can open out the fabrics, the seam allowance and the stitching will all be hidden around the back. You'll notice though that this won't lie flat yet. You'll need to press the seam with your iron. Plug your iron in and turn it up to the highest heat that your fabric can take without changing shape. On the seam side, or the back, of you fabric you will need to iron along the seam. There are a couple of options:

Either press both edges over to the same side, called 'pressing the seams to one side'. Or press the fabric edges in opposite directions called 'pressing the seam open'. It depends on the project that you a are doing on which way you will need to press the seam. For quilts its usually over to open side and for clothes its often open but can vary from project to project.
Finishing the Raw Edges
When we cut our fabric it can start to fray, especially if we use a lightweight fabric or when we wash it. To minimilise this we 'finish the raw edge'. There are many ways to do this so I will just go through two of the simplest ones for now.

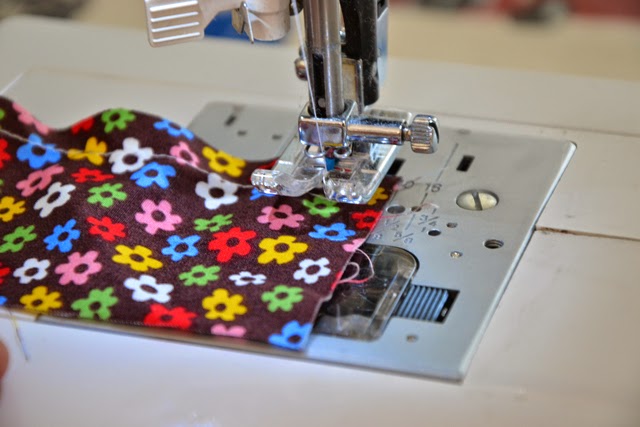
The top example shows zigzag stitching along the raw edge. To do this simply select the zigzag stitch on your sewing machine and sew all the way along the seam. You can do this with both pieces together as I have when your seams are pressed to one side or you can zigzag stitch along each edge if you have pressed your seam open.
The bottom example shows an edge finished with pinking sheers. These are very sharp scissors than cut a zigzag line. You would need to invest in some pinyin sheers to do this method but its much quicker than zigzag stitching all your seams so its worth thinking about if you want to get your project finished quickly.

Stitching Corners
Some seams may require you to stitch a corner. This is actually much easier to achieve than you may think. Simply sew along one edge, when you get to near the corner turn your wheel in the top right hand corner of your machine until the needle is down:

Then flick up your presser foot lever:
Then turn your project around so you can start sewing along the other edge:

And flick your presser foot down again to start sewing. See easy peasy.
Stitch Curved Seams
Some project will require a curved seam. Usually the two curves that you need to sew together will be the same length but different shapes.

When you pin these together you need to 'hill' of the curve to be on top and the 'valley' to be underneath but still with right sides together. This will make it much easier to sew together. Pin as you did with the straight edge, pins all the way along the edge at regular intervals with the point going in towards the fabric from the seam. You need to curve the 'valley' seam around as you go.

Now when you take the seam to the sewing machine ready to stitch it will curve upwards, this makes it much easier to feed it into the machine. You pins will still be in the right direction for you to easily pull them out as you sew. Other than the pinning part, sewing a curved is exactly the same, start and end with a few reverse stitches and keep the edge in line with the right part of your needle plate.
Now you know everything you need to know about seams (well almost). Come back on Tuesday to find out about fabric. Zoe
Find out more about Sewing School here.
Find out more about Sewing School here.
No comments :
Post a Comment