Dished Up: Rabbit!

When I watch TV cooking shows I find myself confused. I watch 'Come dine with me' and end the show thinking I am the best cook in the world. But then I watch 'Masterchef' decide actually I know nothing about food.

The other thing that Masterchef never fails to do is inspire me to try cooking something new. This time it was rabbit. I found a recipe on BBC Good Food website (I get a lot of recipes from here) for Braised Rabbit Pappardelle and popped to the butcher to pick up a bunny. Any butcher should have rabbits in stock although you may find they are frozen, mine was, so take account for that if you are planning to serve it on a particular day.

The recipe, which you can find here, suggests you get the butcher to joint your rabbit but where's the fun in that? I found this video on YouTube and followed the instructions to cut the rabbit up. It was pretty simple and if I ever want to go on Masterchef, I'll have to know how to do these things, he he he.


It's not a quick recipe so I prepped all the ingredients and braised the rabbit in the early afternoon while I was home. That way I could rush in at half 5 after the tinkers swimming, cook the pasta, reduce the sauce and serve up a hopefully delicious meal at 6. 


After a couple of mouthful the husband complimented me on the delicious meal. It was really tasty! However his eating did slow down when he found out which mammal was on his plate. For me, although the sauce was scrummy, the rabbit was quite dry and tough which was surprising after braising it for an hour. So I wont be rushing out to try rabbit again in a hurry but might have a go at the recipe with some chicken or maybe duck next time. Cassie xx

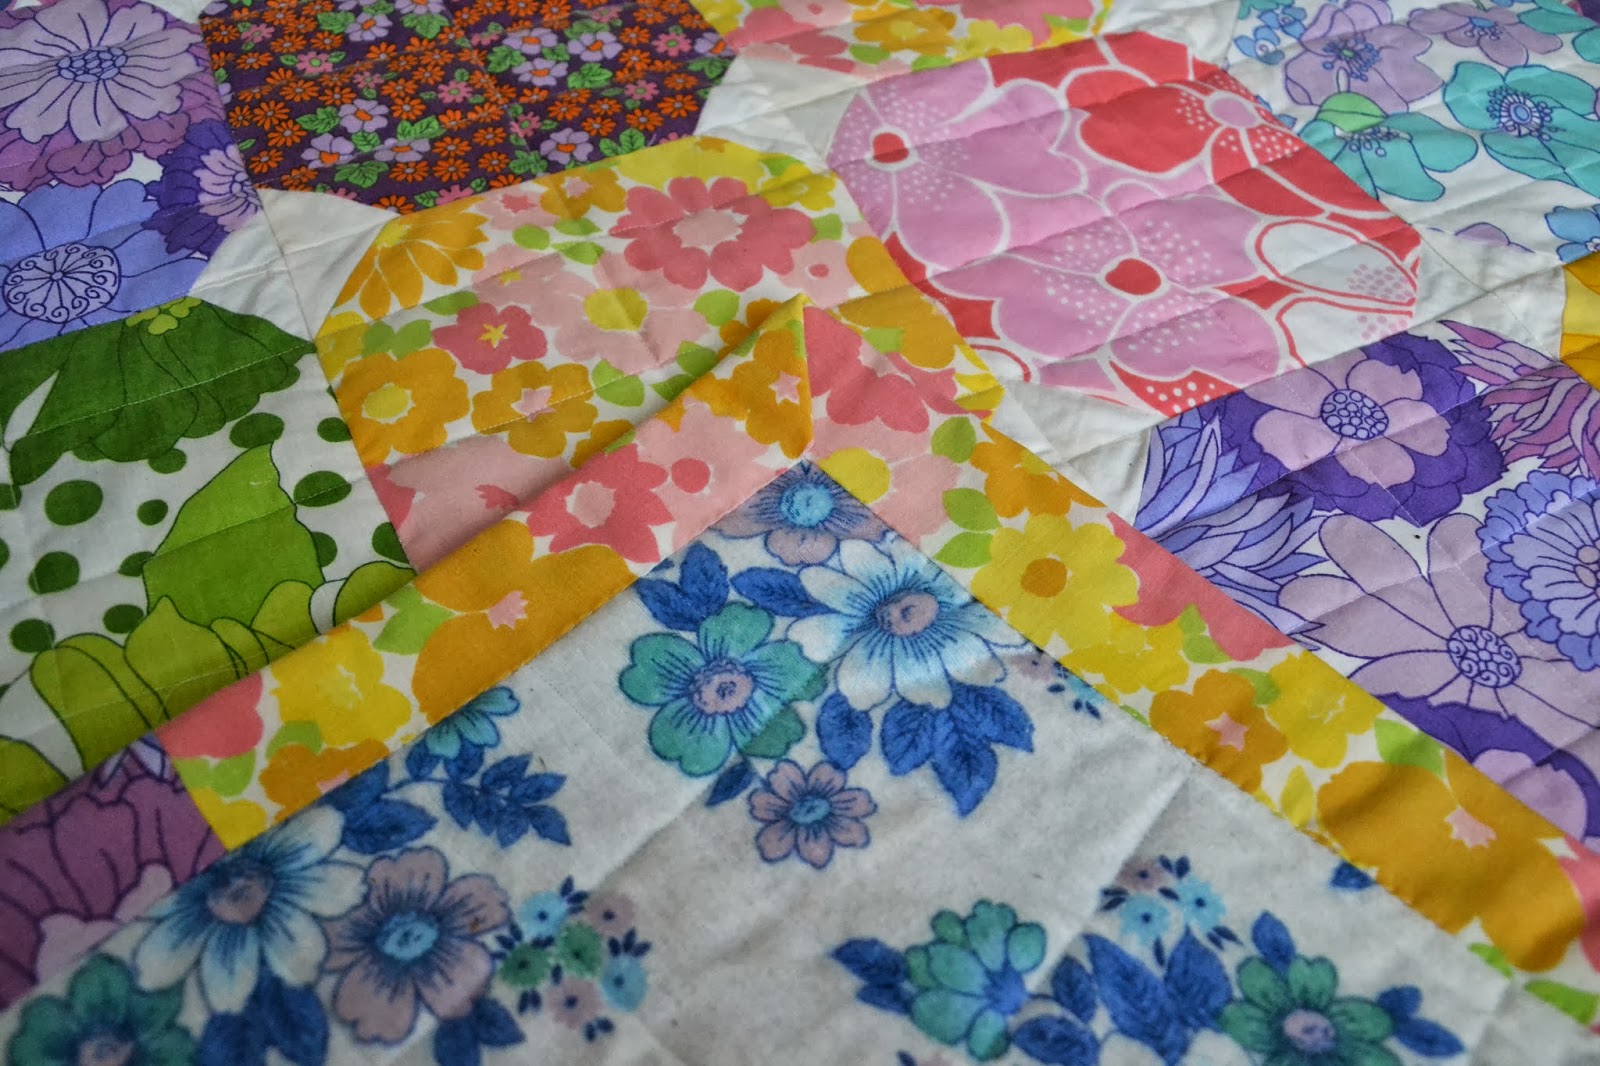
Vintage Sheets Octagons Quilt: Binding

Yey its time for the binding! This is one of the fun parts of quilt making because once its done the quilt is finished too. So I am going to go through how to make 'french binding.' I used this technique for the first time on these baby quilts and I found it really easy, it had a good finish and its all done in one piece. To make the binding simply cut some long strips of fabric about 10cm wide. 

You can use some leftover bits of fabric, a complementary fabric or whatever you have used for the back but you need to cut enough to go more than all the way around. Simply stitch these together end to end and then lie it out around your quilt to check its long enough. If not stitch on another strip or two. Then press open these seems and press your binding in half lengthways.

Now trim down any extra binding and backing that you have. Then line up the open side of the binding to the middle of one edge of your quilt, fold the very end of the binding over and start stitching with about a 1cm seam. You can pin it on if you like but you probably won't need to.  Sew all the way down the side until you are 1cm from the next edge:


Now you need to fold the binding out at right angles to the line you just stitched, away from the quilt like this:

Then fold it again back over so your fold line is along the edge you have just stitched along like this:

And you should have a little triangle like this:


Now you need to stitch along this new edge all the way to the next corner and then fold it in the same way. Go all the way around the quilt until you get back to where you started, overlap the beginning by a few centimetres and then cut off any excess. Then fold the binding over the edge of the quilt to the back and slip stitch it on. You can find instructions for slip stitching here. This is done by hand but it I always quite enjoy sitting down in front of the telly, quilt over my lap, stitching the binding on. My slip stitching is no where near as good as the tutorial above but I am quite pleased with it still, its a big improvement on my first few attempts.


Then you need to just trim off any threads that you have sticking out and you're done. Woohoo! I hope you have enjoyed making a quilt with me, If you have any questions please feel free to comment or if you have some photos why not instagram them and use the Tadpegs hashtag or @zoeblofeld.

We tried to take pictures of the finished quilt this weekend but it was a bit windy! I will try and get a better shot when the storm has ended. I'll show you the quilt on my bed very soon, we are decorating our room and I want to show you it all in one go. Zoe xx

If you want to make yourself a quilt you can find the other stages here:

Choosing Fabric
Fabric Cutting
Piecing
Assembling the Quilt Top
Making the Quilt Sandwich
Quilting

Make a Chalkboard Pinboard

I have already shared with you about the Nearly Christmas Mini Craft Fair and I mentioned this board we used to display our prices (I removed the prices for the blog because these may change). It isn't just a chalk board though, oh no, it's much more than just a chalk board. Its a pinboard too! Well OK I know its not a surprise now because you read it in the title but still.

You could easily make one of these yourself out of a pin board and some chalkboard paint and use any where and for any purpose but I always had the craft fair in mind. That didn't stop me letting my daughter Romilly go wild with a chalk on it before we needed it though.

When we no longer need it for craft fairs I may put it up in her room to display her 'craft' and draw pictures on. Such fun! Zoe xx

Make a Quick Infinity Scarf

With the weather getting colder by the day around here I found myself needing a few extra scarfs so naturally I made one and it was SO easy. If you have a sewing machine sitting around and have never used it but really want to learn, then this project is for you. Or if you have a metre of fabric left over from something else and just want it to go to good use, then this is a good project for you too. I fell into the second category, my fabric was leftover form making this tunic dress and I liked it so much I wanted to use it. It took me about 15 minutes to make because it's very easy and doesn't require any measuring. All you need is 1m (approx) of fabric, some fabric scissors and a sewing machine.

Take your fabric and cut it in half carefully but it doesn't need to be too precise.

Then put these two pieces right sides together and straight stitch along one of the short sides. Then open out, no need to press, it will have a little more volume if you just leave it as it is.

Then fold it in half lengthways and right sides together and then stitch along the long open edge to make a very long thin tube.

Now you need to turn the tube right side out:

And turn it round to make a circle shape and tuck one end into the other. Try to get them to lie flat together and then you carefully turn over the outside piece to hide the cut end and make a hem. You can pin this if you have pins.

Then you simply stitch along this edge, turn it over, tuck the other side in a stitch again. Its not the neatest finish but its quick and simple and you can hide this round the back any way.

All you need to do now is trim your threads and put it on. Put it over your head, twist it and put it over your head again. You can puff it out a little and your set to take your own infinity scarf selfie:


I need to work on my selfie skills apparently! If you've thinking of starting sewing then why not try this super simple scarf? Zoe xx

Nearly Christmas Mini Craft Fair

Last week we had a really fun evening having our very first taste at selling our own goods at our Nearly Christmas Mini Craft Fair. It was a good evening with some friends and we learned a lot. Here are a few pictures of the things we were selling and a little list. I have removed the prices from the pictures because some of these may change.


We made a chalkboard to display all our prices (I'll share about this soon too) and we had lots of cake including rocky road and squidgey apple cake, no pictures of these sorry. We also confused the kids by getting the christmas decorations out, they thought it must be time to start hanging stocking and waiting for Father Christmas too.


We will be attending a couple of local craft fairs too and we will keep you posted about those if you are interested. Happy Nearly Christmas. Zoe and Cassie. xx

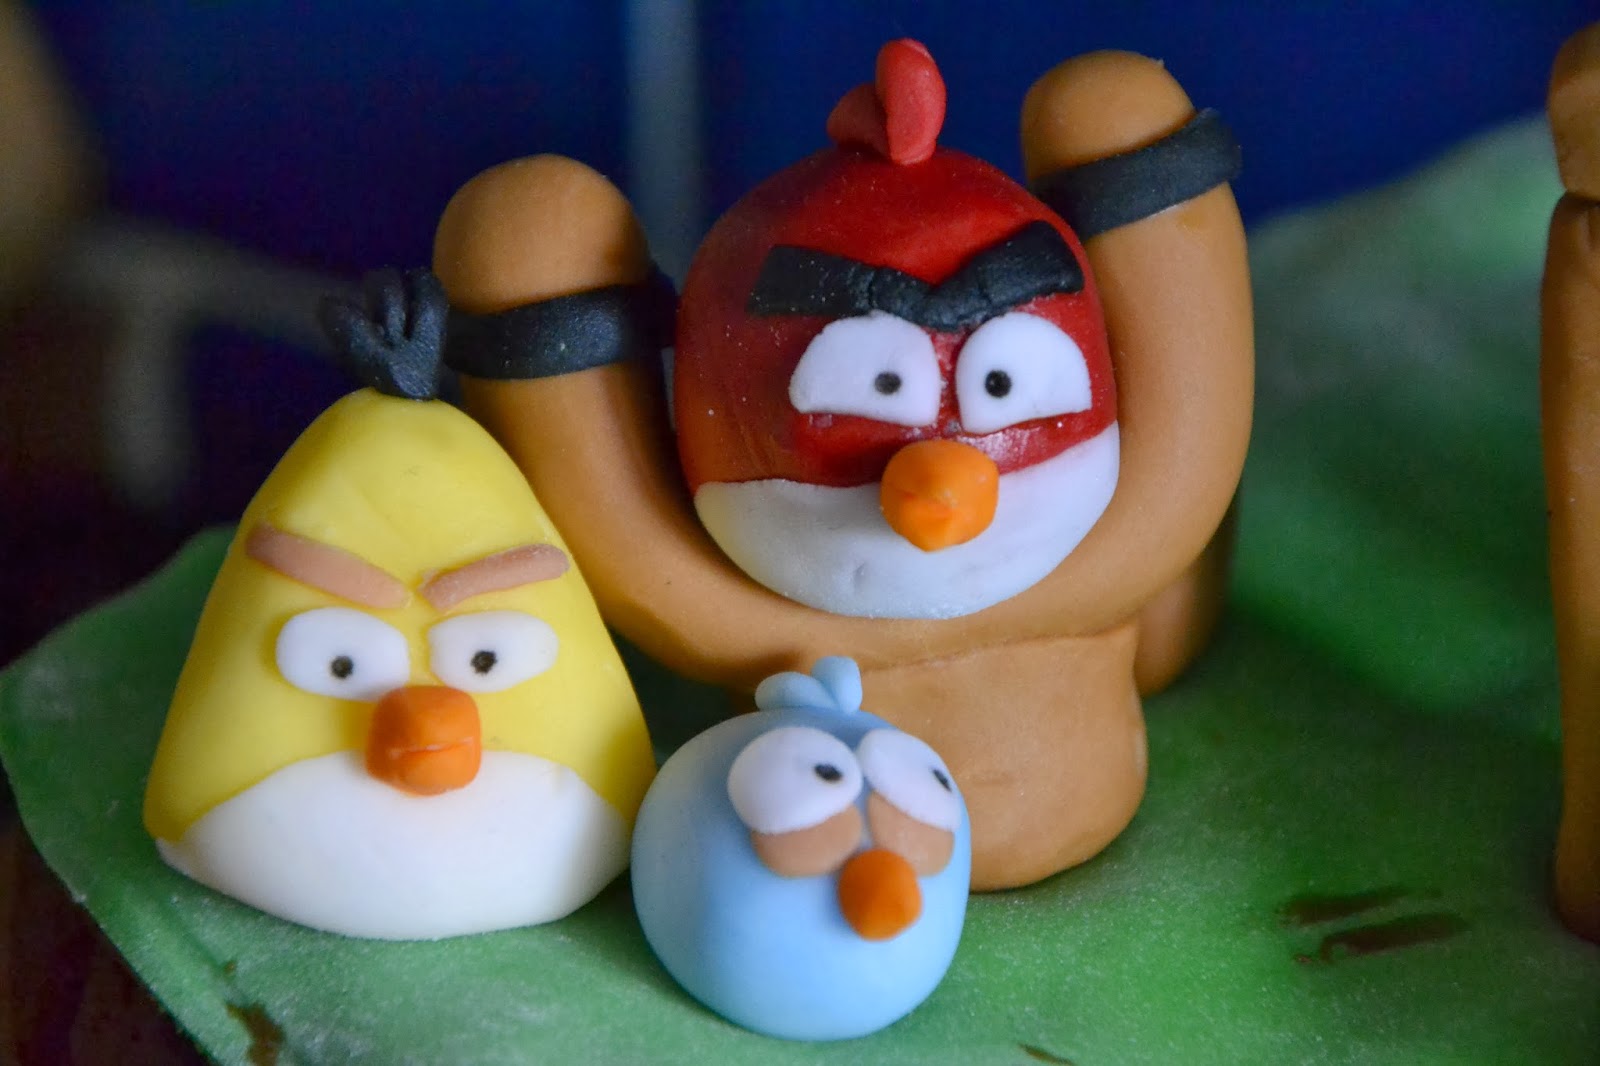
Angry Birds Cake

At the weekend it was Boaz's party and I made him an angry birds cake of course. You probably already saw the crocheted angry birds I made for him and he loved these. I modelled the birds and pigs out of fondant icing for this cake.

While I am not cake making expert I have learned a thing or two about icing over the last few years so here are my top tips:

1. You don't need lots of fancy equipment to make decent icing figures, I usually just use my hands and a knife. Sometimes I use the knife handle to make blunter dents and I have used cocktails sticks too but nothing fancy or expensive.

2. Be careful not to let your hands get too sugary, if you do then it starts to all stick and can undo alot of good work. You can wash your hands occasionally as long as you dry them thoroughly afterwards.

3. Black icing is very tricky to use so be very careful with it, and the dye in gets all over the place (see the marks on the top of this cake)

4. Lastly but most importantly don't expect your first (or second or third...) to look exactly like you're hoping. As with all craft this is about practice and experience and they'll get better as you make more. Plus kids are happy if it even vaguely resembles whatever it is you're aiming for.

Its not the fanciest cake in the world but he loved it. Happy Birthday Boaz! Zoe xx

Dished Up: A Whole Lot Of Apples


Today we welcome Cassie back to Tadpegs. You have met her before when she wrote about the crocheted camera case and this is the first in a series of posts Cassie will be writing about food we are calling 'Dished Up'. Enjoy!

I am a girl who LOVES summer so it is really good for me to be reminded of the joys of autumn to ward off those post summer blues. A friend helped with this recently as she gave me a lovely large bag of apples from the tree in her garden. So one beautifully sunny afternoon I sat in my garden and set to work peeling them.

The husband loves stewed apples so I just threw most of them in a big pot with a glass or two of water and cooked them down. I like my apples quite tart so I didn't add any sugar until they were all cooked and then added some to taste. make sure you keep an eye on the apples though and stir them regularly other wise they will catch on the pan.

I filled couple of tubs with the apple and put them in the freezer ready to pull out and whip into a crumble when we're entertaining over the winter. Some was reserved just to eat that night and I even had some cream in the fridge for the more decadent (and fast metabolismed) in the family to have with theirs.

I also used some of the apples to make a Squidgy Spiced Apple Cake. You can find the recipe here. In fact I made two. It was really easy to make and came out deliciously moist and tasty. I served one at our church house group and it went down a treat. The other is in the freezer all ready for our Nearly Christmas Mini Craft Fair which you'll hear about in a few weeks.


Thankfully there was a piece left for me to sit down after a morning running around with the tinkers and enjoy with a cup of tea. Cassie xx

Vintage Sheets Octagons Quilt: Quilting


So we are on the penultimate stage of make a quilt, the quilting. I can here some of you breathing a sigh of relief that its nearly over but hang on, its going to look amazing very soon. To see the other stages look here, here, herehere and here. This stage does take quite a while and can make your arms ache as you feed the heavy quilt through the machine however it can totally change the look and feel of your finished article so it is totally worth all the effort.


Quilting simply means stitching the three layers together in a pattern all over the quilt. You can see some free motion quilting on the Baby Quilts For a Boy and a Girl that I made a few months ago and this affect is lovely but it is quite tricky to do and I thought it would simply take too long on a quilt this size. Two other popular quilting methods are 'in the ditch' quilting where you stitch along the edges of the patches on the quilt top or 'shadow quilting' when you stitch the same distance from the edges of the patches and create a sort of border around the patch. You can also send your quilt off to be professionally quilted (and this can look amazing) but where is the fun in that? I have gone for a very simply straight line quilting.


Its a good idea to start the quilting in the middle so that you push out the wadding and extra fabric as you go to the edges. So start you very first line of stitching right in the middle where you folded it up last time and work out from here. Along the longer length of the quilt I have stitched along each edge of the patches and 3 through the patch. The middle line is supposed to be central and the other two lines are supposed to touch the edges of the corner triangle.


Once I had finished all the lines in this direction I laid it out on the floor again and rolled it up the other way. In the other direction I have quilted lines along the edges of the patches and only 1 line down the middle. I didn't want it to look too 'checkerboard' and I wanted to emphasise the length by having more lines in this direction.


You can obviously quilt in any way you wish. My biggest tip would be to not 'under quilt' it, make sure you stitch enough of a pattern on top because it really does transform your work and it looks unfinished other wise. Another option I think might look nice here is zigzag lines rather the straight ones but I would love to see what you do so leave me a link below. The next stage of the octagons quilt, the binding, will be ready in two weeks. Exciting! Zoe xx

Nearly Christmas Mini Craft Fair, A Sneak Peek


This year for the first time ever my sister Cassie and I are hoping to sell some of our makes at a few Christmas craft fairs. We are pretty excited about this and at the moment VERY busy. Next week we are hosting a few friends at her house to have a look at our makes and give us a bit of feedback on what they think, whether they are priced fairly and if they'd be interested in buying them. Basically we are doing some market research on a very small and fun scale. I thought I would share with you a few pictures of our progress so far.


So there you have the first few pics of what we have been up to. We will share some pics of the sale and the final products when we have finished. In the mean time can you guess what they all are? Zoe and Cassie xx

Vintage Sheets Octagons Quilt: Make the Quilt Sandwich

Welcome back to the Vintage Sheet's Octagons Quilt, if you haven't seen what has been going on so far you should have a look here, here, here and here. This is the quickest stage of making a quilt so I will be coming back in only one week writing about the quilting. The quilt sandwich is the name we use for the layers of a quilt that come together, normally a patchwork top, wadding (or batting) and a quilt back. My quilt back is simply one very large vintage flat sheet but if you can't find one piece of fabric large enough you can make a patchwork back, or sew a few pieces together. If you decide to sew a few different bits of fabric together its a good idea for the left to be a mirror of the right, this makes it obvious its the back. Also avoid having a line of stitching straight down the middle as this is where you will probably fold it and it will be less likely to life flat again afterwards if you stitch here.


So once you have your three layers you simply need to lie them down in the right order. Start with the back and lay it face down on your work surface (I use the floor). Then you lay your wadding (batting) over this and spread it out as evenly as you can. It's quite tricky to get rid of all the bumps because it gathers up when its rolled into the packet to sell so just do your best. Then lay your quilt top, the patchworked section, over the top making sure it doesn't go over the edges of the other two layers and if possible your backing and wadding should be larger than the quilt top by a few inches all the way around.

Next you need to pin or tac all the layers together. I am a fan of pinning and I use simple straight pins as this has always worked for me. However if you think you'll be doing the quilting over a longer period of time or you'll be doing a very complicated quilting pattern then you could use safety pins. If you pin then make sure you have the pins at regular intervals and not too far apart. Make sure you have enough for the layers to feel secure. Alternatively once you have pinned it you can tac (or baste) it together. This is when you use long running stitch through all the layers to hold them all together with thread. It can be more secure but it takes much longer and you may find as you quilt that you want to move the layers a bit to avoid bunching. If you decide to tac the quilt try and use a contrasting colour of thread so that you know which to unpick at the end.

Then you need to roll it up ready for quilting (or to put away before you get to quilting). So roll up one side to near the middle as above.


Then roll up the other side so that it looks like the above.

Then you can roll or fold up the bottom so you can put the whole quilt on your knee to feed it into the machine. If your ready to quilt straight away then go ahead or you can wait until next week so you can see how I have done it. Zoe xx
Related Posts Plugin for WordPress, Blogger...